ROZOME is the Japanese
version of the wax-resist process known elsewhere as batik. The earliest
rozome examples date from the 8th century CE. For a wealth of information
on rozome see the book by Betsy Sterling Benjamin, THE
WORLD OF ROZOME, Kodansha international, 1996. What follows is the
method of rozome which I now use after studying with her.
Planning and preparation:
First a design is drawn with pencil or charcoal on
the back of white kimono silk. Then the silk is stretched, and a mixture
of soybeans and water called gojiru is applied as sizing. The stretched
silk is then allowed to dry.
Waxing:
A molten mixture of beeswax and paraffin or soywax is painted,
spattered, stamped, or otherwise applied to any areas where the silk
is to remain white. The image areas are first waxed on the back, where
the drawing is, then once or twice more on the front.
This video is a VERY brief demo* of the Rozome process.
*Please note: the wax I am using
in this demo is beeswax / paraffin.
The footage was shot “BS”
—
before soywax!
To adapt this rozome technique to soywax, try a wax mixture of 50% soywax to 50% beeswax. Unfortunately, this still requires drycleaning.
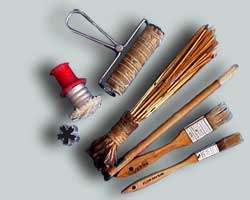
These are a few useful
wax tools:
roller, brushes, dauber,
metal stamp, spatter brush.
All must
be natural bristle or wood,
since synthetic
materials would melt in the
hot wax.
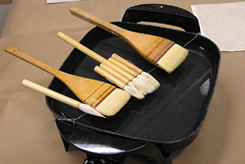
Right: Wax brushes in a workshop taught by rozome master Shoukoh Kobayashi. Note that the brushes are suspended over the hot wax on a string so that they do not touch the hot metal pan.
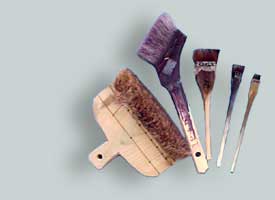
Dyeing:
These are a few of the Japanese brushes used
in rozome.
The largest is a jizome or hikizome brush, used for blending
large
background areas of color. The next brush is angled
ergonomically
to make it easy to reach across yardage.
The three brushes on
the right
are surikome brushes,
used for blending smaller areas of color.
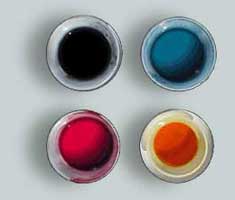
Acid
dyes:
I prefer to mix all colors from the basics: warm red, cool red,
yellow, blue, and black. These dyes, unlike Procion MX fiber-reactive
dyes, are set at the end of the dye process by steaming. This allows
the artist to re-wax areas as soon as they dry, rather than waiting
overnight for a chemical reaction. Acid dyes are not permanent until
steamed.
Blending the dye
with the surikome brush.
The
stretched silk is dampened and the lightest color of acid dye is brushed
on with special Japanese brushes. These allow the artist to blend areas
of color from transparent to saturated, allowing for wonderful luminous
effects when layered.
Repeat the above 2 steps up to 20 times...
Each dyeing is followed by a waxing: hot wax is brushed
on to preserve the previous color wherever it is needed. Then the dyeing
is repeated, each time building up to the darkest color. This may require
15 or 20 layers, but the acid dyeing goes more quickly than fiber-reactive
dyeing (see batik on
cotton) since the dyed areas can be waxed as soon as they are dry.
In dry, sunny New Mexico, this might be several times a day!
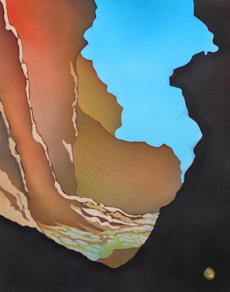
sandstone & turquoise
Rozome on Kimono Silk
Framed 28 x 22"
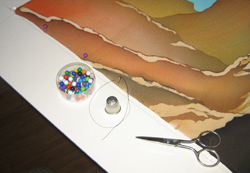
Finishing the
piece:
After all dyeing and waxing is complete, the piece
is ironed between layers of paper, then rolled in clean paper and steamed
for 3 hours to set the dyes. Any remaining wax is removed by the drycleaner,
and the silk is washed, ironed, and sewn to acid-free foam core. The
stitches are covered by an acid-free double mat, and the piece is framed
under ultra-violet screening glass.